
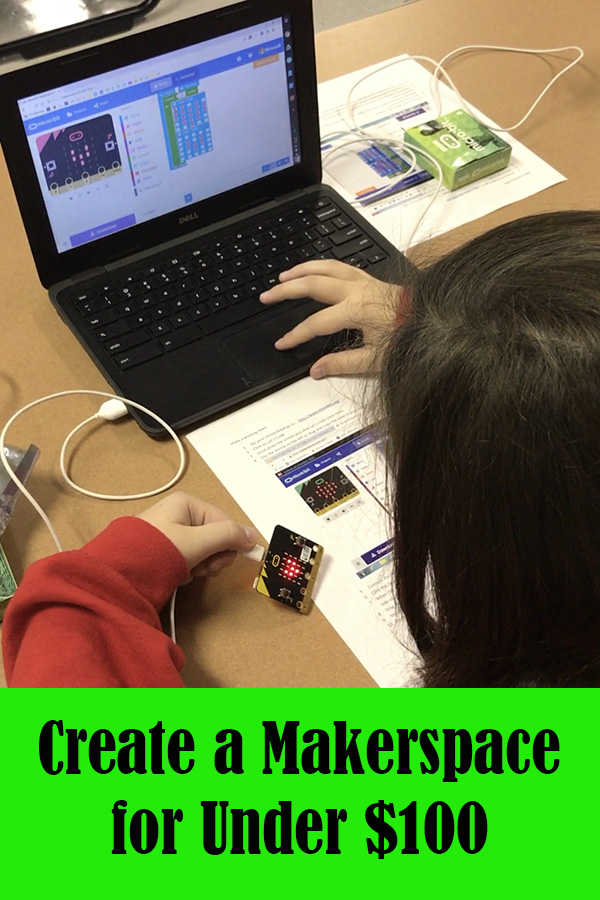
So, you want to set up a makerspace, but aren’t sure if you have the funds to get things up and running. Never fear! With a little ingenuity, you can set up a pretty amazing makerspace for under $100. This post contains some affiliate links for your convenience (which means if you make a purchase after clicking a link I will earn a small commission but it won’t cost you a penny more)! Read my full disclosure policy.
Low Cost/ No Cost Craft Supplies
When looking for items for your makerspace, the first place to start would be in your school’s supply closet. Check with your principal or whoever is in charge of the supplies that are ordered for classes each year. Construction paper, tape, rubber bands, glue, scissors, thumbtacks, crayons, markers and paper of all kinds are items you need to keep on hand for any makerspace.
The next place to look is in your craft closet. Beads, buttons, yarn, string, pipe cleaners, needles, thread, and fabric can be great additions. Students can use these to make jewelry, sew projects and more with these few additions.
Once you’ve exhausted your stash of free craft supplies, head to your local dollar store to get the rest of the items you need. Consider adding paper plates, cups, dowel rods, a hot glue gun, straws and any such items you might need.
Free Online Resources
Coding websites and apps are great tools to add to your
Code.org – Here you can find over 25 million coding activities to help students of all ages learn to code.
Tinkercad Circuits and 3D Designs– Learn to program with an Arduino and create items to be printed on a 3D printer using Tinkercad. If you are a Google school, have students sign in using their school email accounts.
DIY – DIY is a site that can help students learn anything. Students can discover new skills, accept challenges and earn badges.
Scratch– Student can learn to code to create stories, animations and games.
Alice – Alice is a block based coding programs that allows students to create stories, animations and games.
Donations
Never underestimate the power of asking. When we were just starting our
Low Cost Items
To round off your $100 budget choose from these low cost items to add a little something extra to your makerspace.
3D Pens – Students can learn the basics of 3D design with 3D pens and filament. Students can use stencils from the 3D Doodler website to build objects ranging from glasses to ornaments. I like the one show below because it has a stand to hold the pen when not in use.

Strawbees – Build and invent using straws with the help of the Strawbees connectors and the STEM challenge cards.

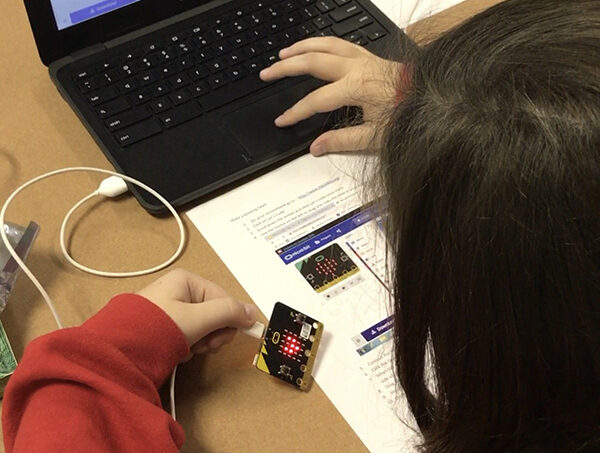
Microbit – This amazing little device is a circuit board that can be programmed using block coding. It has 25 built in programmable LEDs, a built in accelerometer, a motion detector and two programmable buttons. Students can create games, scrolling signs and so much more. Lessons and projects can be found on the Microbit website.
Sphero mini – Consider this the little brother of the Sphero line of robots. It may be half the size, but it still has the same coding abilities at less than half the price. The Sphero EDU website and app contain a vast list of activities for students to try.
Bit Coding Robot by Ozbot – The original Ozbot is good for beginners. Learn to code with markers, stickers and more. There are tons of resources on the Ozbot website for getting started with these little gems.
Circuit Building Supplies – Have students learn to read a schematic to create a simple circuit. They can then use that circuit to create a light up card, or poster. To make this work you need copper tape, LEDs and 3V coin batteries.
You don’t have to have thousands of dollars to start your makerspace. So, start raiding your supply closet, ask for donations, do your budget shopping at a dollar store, visit the online resources and pick your favorite tools from the low cost resource list. You’ll have an amazing makerspace in no time!