Become a Coding Pro With Microbits

When teaching students to code it helps to have something that is both easy to use and grabs their attention. Microbits can do just that. Show your students the basics and turn them loose. In just a few minutes, you’ll have students excited about coding and the projects they can create. This post contains some affiliate links for your convenience (which means if you make a purchase after clicking a link I will earn a small commission but it won’t cost you a penny more)! Read my full disclosure policy.

Become a coding pro with microbits

Microbits are powerful microcomputers. They are a cross between a Makey Makey and an Arudino. You can program it using drag and drop blocks or typing lines of code. Microbits come with 25 programmable LEDs, 2 buttons, USB connector, pin connectors, a compass, an accelerometer, radio and bluetooth antenna, light and temperature sensors and a battery connector.

The Microbit website has a built in simulator, so you can test your program before you download it to your device. I start the students out with a simple program where they make a heart or a smiley face appear on the Microbit.

To do this, connect the Microbit to a computer. Then go under the Basic section and select “show leds“. Then drag it into the on start box. From there, click Download. Look in the download folder on your computer and drag the Microbit file to the Microbit listed under devices. You should see the yellow light blinking on the device to show it is downloading. Once it is ready, the heart will appear on the device.

Microbit with image of coded heart and simulator

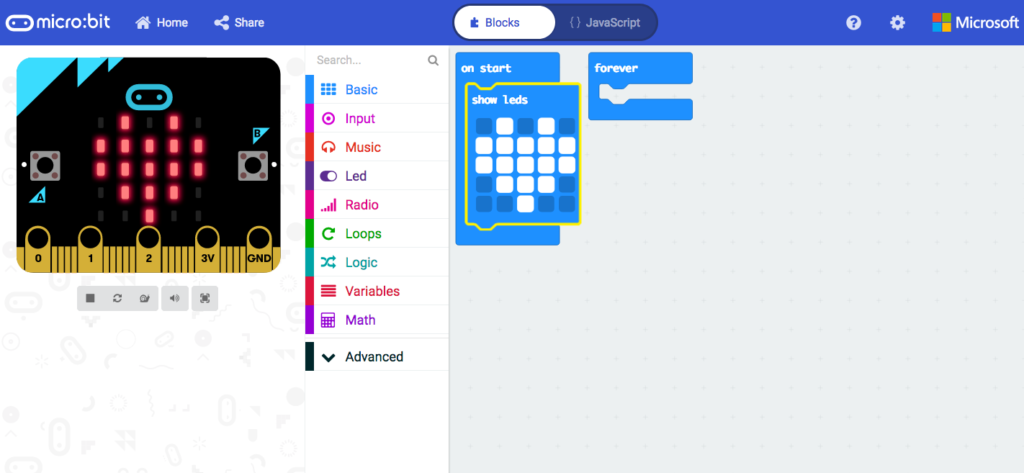
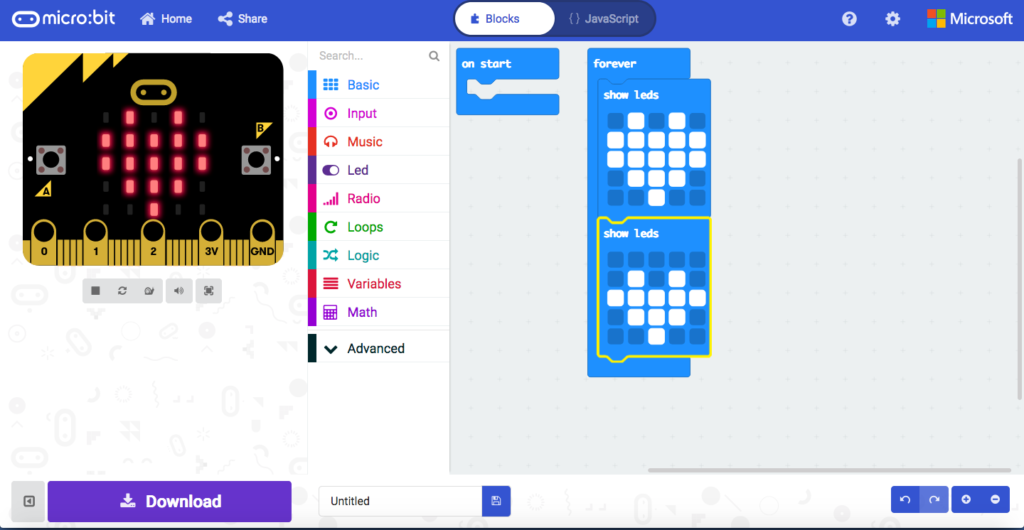
Next, I have students create a blinking heart or have them make the smiley face switch between a smile and a frown. To do this, have students drag their “show leds” from the first activity from the “on start” box to the “forever“box. From there, go under the Basic section and drag over one more “show leds” box and place it under the first one in the “forever” box. Follow the same steps as above to download the program to the device.

Microbit coded to show blinking heart

Now that students understand a few basic coding principals, it’s time to make it a little harder. They will build a rock, paper, scissors game using the buttons.

First have them clear the coding area. Have students go under Input and drag over 3 separate “on button * pressed” boxes. Change one to button A, the next to button B, and the last to buttons A+B. Then under basic drag a “show leds” box under each of the “on button * pressed” boxes. Button A should represent rock, Button B represents paper and Button A+B represents scissors. Have students test it on the simulator before downloading it to the device.

Microbit coded to show rock paper and scissors

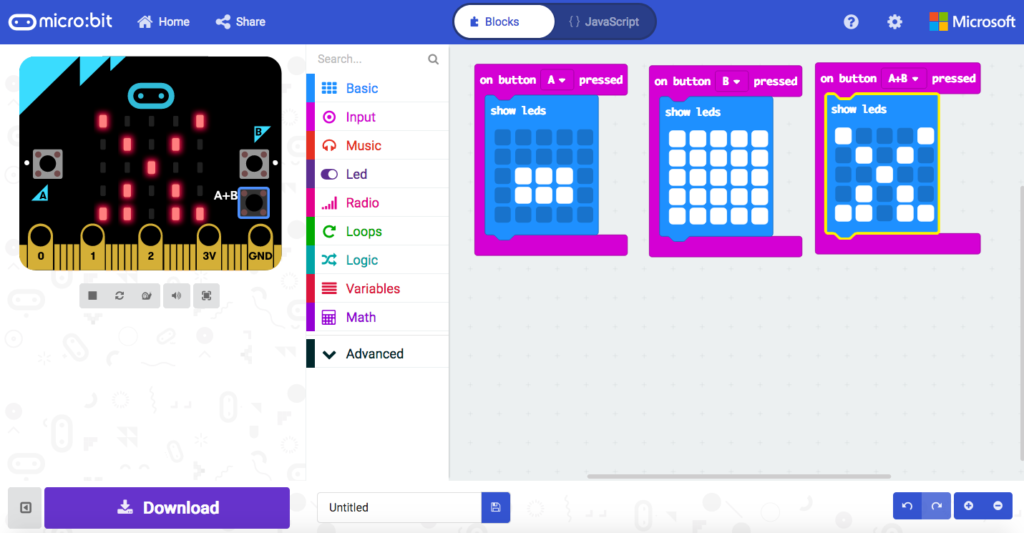
Have students test their devices by hosting a rock, paper, scissors tournament at the end of class. This has been a big hit every time I’ve had students use them.

This activity shows simple ways to get started with Microbits, there are so many more ways they can be used. Be sure to check out the Ideas section of the website for additional projects. Best of all, the Microbit starter kits with a battery back and cable cost less than $30. You can also get kits with a few more bells and whistles like the one below for a few dollars more.

Leave a Reply

Your email address will not be published. Required fields are marked *